_edited.jpg)
I read this article written by Kristin Jackvony (@KristinJackvony) where she talked about the concept of a testing wheel and how it can help you identify the areas where you need to test. I realised that most of my posts are around automating functional requirements. As testers, we also need to give importance to non-functional requirements such as performance which gave me an idea for my next blog post.

When it comes to doing performance testing on your application, the first tool that has probably come to your mind is JMeter. JMeter is the most popular open source tool for performance testing. However, JMeter's learning curve is a bit steep. When you write a test script with JMeter, it takes some level of understanding to get used to the jmx format but once you get used to it, it's quite powerful. If you are looking for an alternative to using JMeter, there are a lot of options out there to choose from and Taurus is one of them. In this post, I'll talk about the importance of doing performance testing, what Taurus is and walk you through how you can write your first test with Taurus.
Why Performance Testing?
Have you ever experienced using a website and midway, it suddenly crashed or the response time is appalling? Performance testing aims to find any performance bottlenecks in our application so the user experience is not affected everytime we release new features. We do performance testing to improve our application's response times because nowadays, if your application loads slowly, this will decrease your user's satisfaction and give advantage to your competitors. It's important to do performance testing because your functional tests will not reveal how your application will behave on certain situations such as experiencing huge amount of traffic (think Black Friday sales) and this is where load testing can help, which is a form of performance testing, but you focus on testing your application's behaviour when multiple users access it at the same time.

What is Taurus?
Taurus is an open source automation tool created by Blazemeter which provides an abstraction layer over your JMeter, Grinder, Gatling and even Selenium tests. It's actually an acronym for Test Automation Running Smoothly (we'll see in this post if it's really smooth 😃) and helps us identify where the bottleneck issues are in our system.
Taurus include the following features:
Easy installation and setup
Tests are written using JSON or YAML
Ability to run existing scripts that are written in JMeter, Grinder, Gatling or Selenium
Merge multiple test scripts easily into a single test run
Real time reporting
Integration with Blazemeter reporting dashboard
Installation
If you are a Mac user, Taurus can be installed easily using Homebrew where bzt stands for BlazeMeter Taurus.
brew install bztFor Windows and Linux users, you can refer to the installation guidelines here. Taurus also has an official Docker image which is great if you want to run your performance tests on containers.
Now, once you have taurus installed, typing in `bzt` in your terminal should give you the following output.

The error message is coming because we have not pass our test files 🙂
Writing our first Taurus test
We will write our first Taurus test using YAML. This guide here has helped me understand the configuration needed to write a Taurus test so make sure you check this out. I've also created this github repo here which contains the following configuration.

Let's look at this config file in more detail.
Taurus contains some predefined top level keys and on this example, these are settings, execution, scenarios, reporting and modules.
settings contain your top level configuration for your test plan. You can store your environment variables here or directory where you want your test artifacts to be saved. Because I need to store my Blazemeter API keys as an environment variable, I need this key.
execution represents what needs to be executed and on what metrics. For this example, I've chosen to have 20 concurrent users, a ramp-up time of 2 mins which is the time it should take to reach 20 concurrent users, and a hold-for time of 5 mins which is the time to hold the concurrency.
scenarios contains what we need to test so in this case, my personal blog 😅
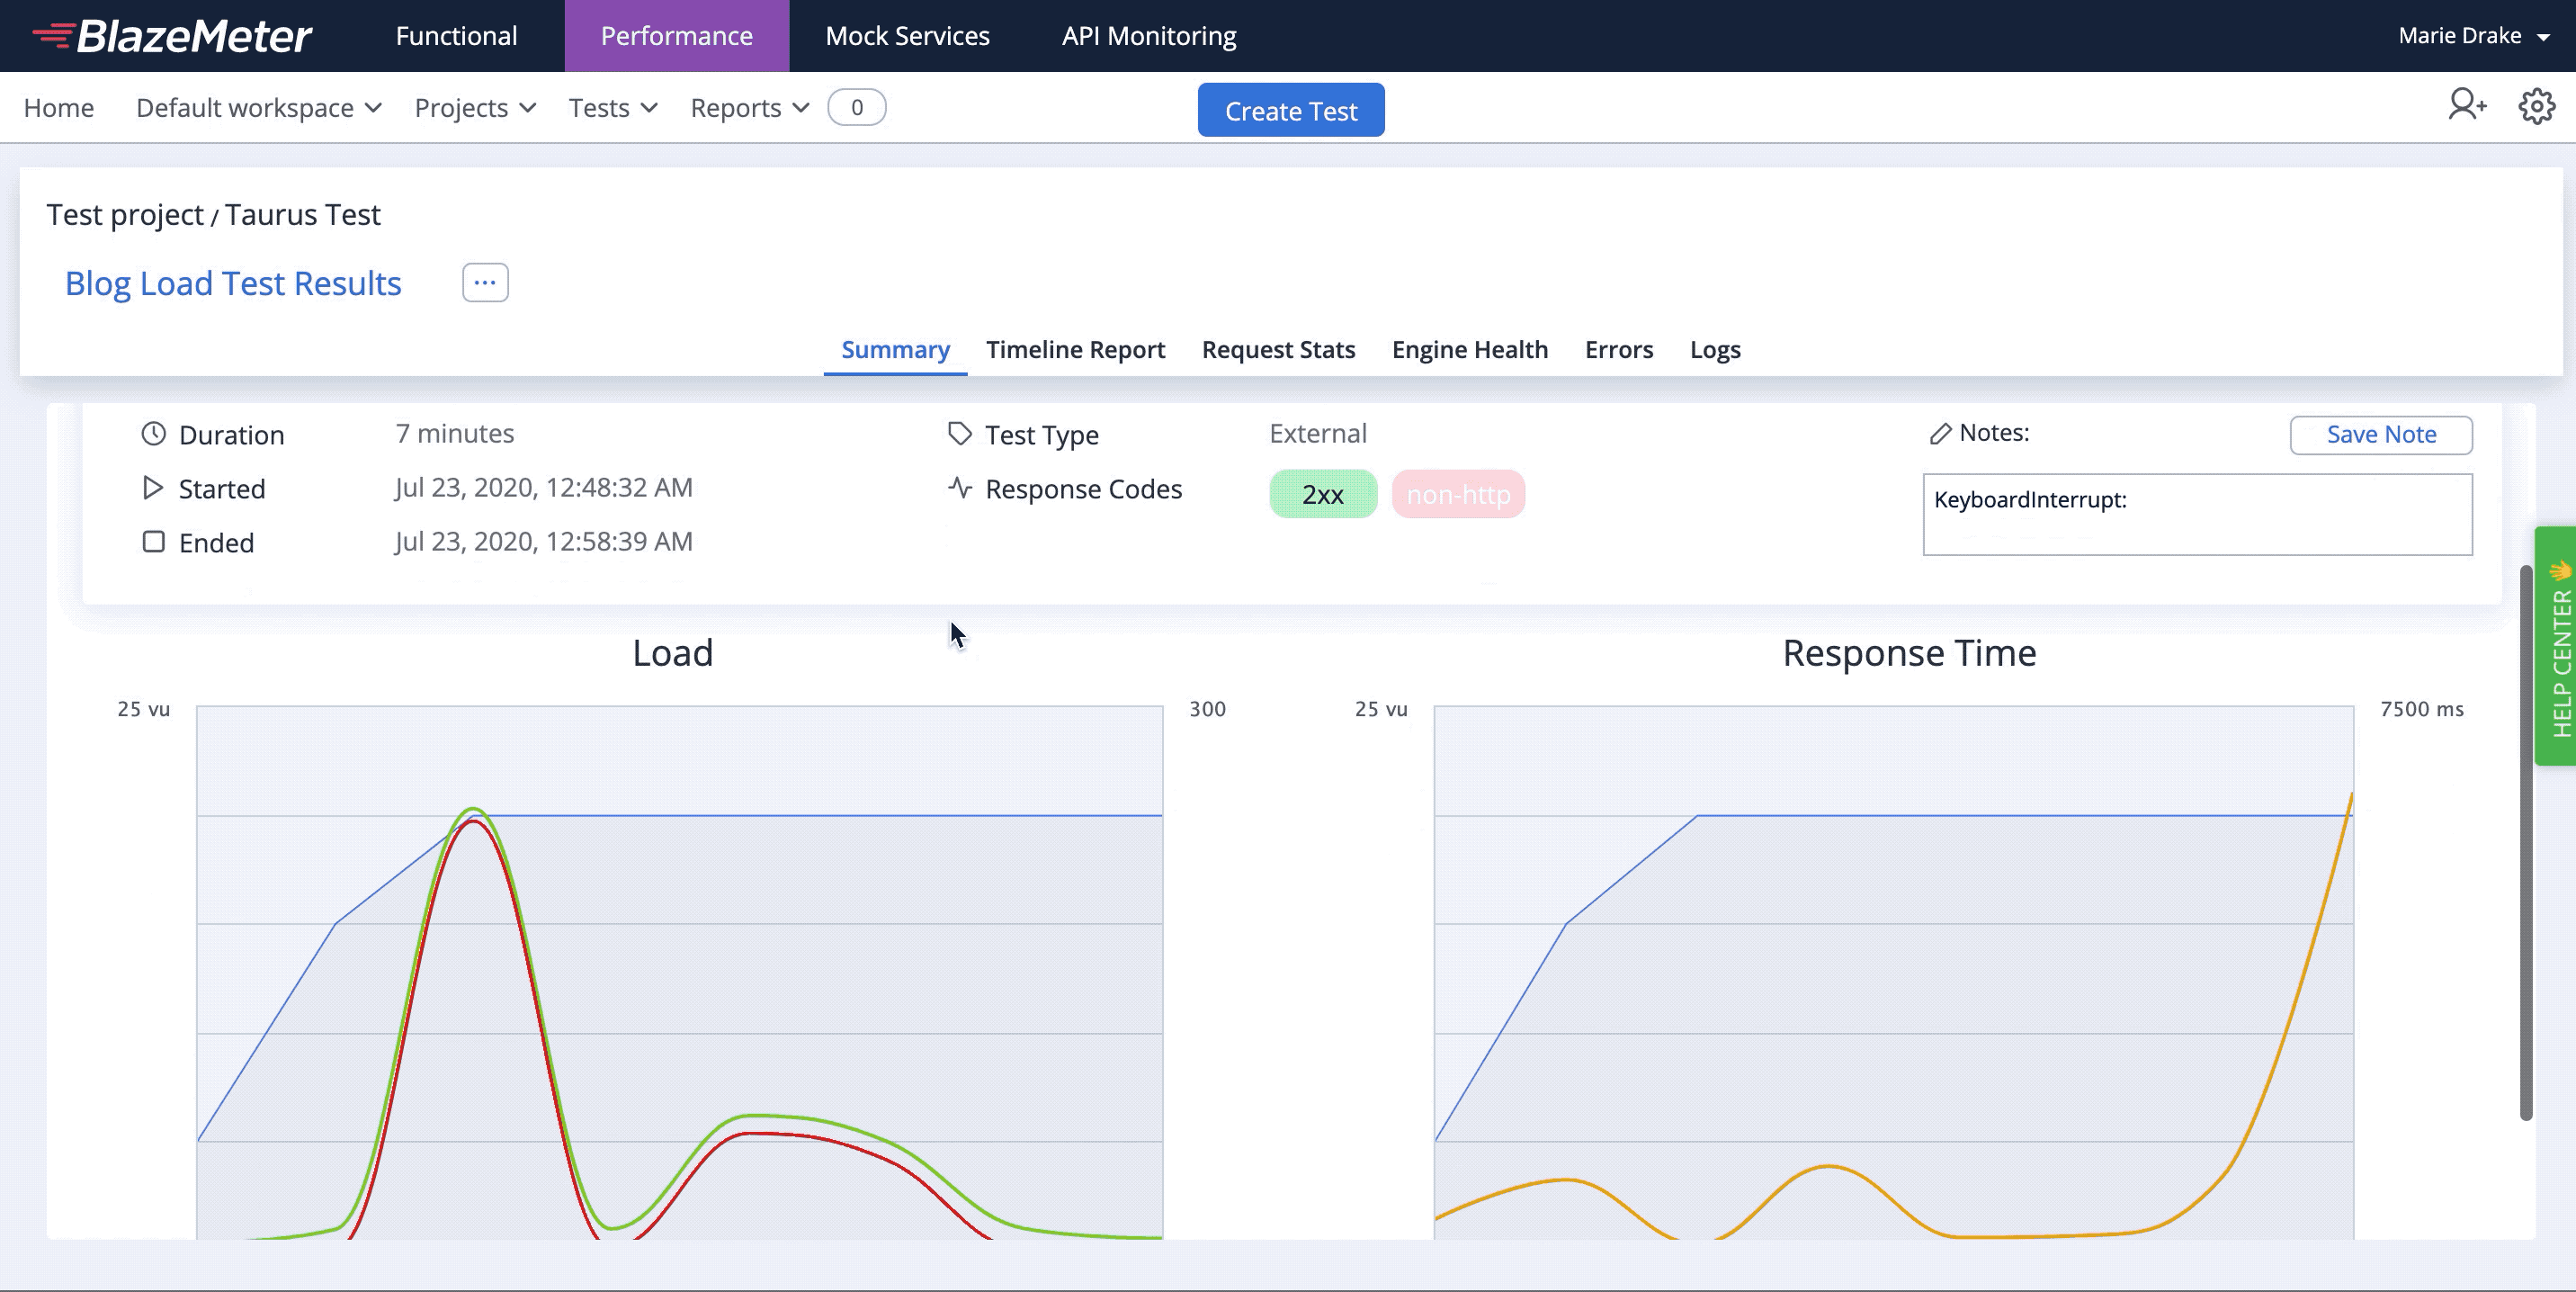
reporting contains the different reporting options. final-stats shows a summary table after the test execution, console shows a live test stats straight from your terminal and blazemeter will show a nice looking interactive report at the end (see screenshots below).
modules contains the details we need to get Blazemeter integrated and this is where I need my API key that I've exported as an environment variable. You can refer to this article here on how to get an API key in Blazemeter.
Running our first Taurus test
To run the test, just type the following in your terminal:
export BZT_TOKEN=<bzt token here>
bzt taurus-sample.yml
What's great is you get a live stats reporting straight from your terminal and you can see from the image above that I have some performance errors already on my blog! 😅

When your test is finished, you also get the summary above from the final-stats reporter and since I am using the Blazemeter reporting, you get a link to an online report which is super useful and as you can see from the report below, there were a lot of timeout errors. 🙈
Wrapping Up
Blazemeter has a really good course to deep dive into Taurus so if you are interested, you can access the course here. This is just an introductory post so make sure you check out Taurus's documentation to find out more information. Alternatively, you can check out the blog posts below from Rafaela Azevedo if you want to know more of other tools used for performance testing.